One of my dearest memories from childhood is watching Cosmos with my big brother. Carl Sagan’s TV show was my main inspiration to follow a science career (kind of), and to my general skepticism.
In my favorite episode, Sagan explains the three dimensions we can sense, and why we can not perceive fourth. He introduces the concept of the tesseract: the projection of a cube (three-dimensional shape) in the fourth dimension. Since we can not perceive the fourth dimension, we can only build the “shadow” of the tesseract in our three-dimensional space.
Skeleton & skin
As part of my 3D Desing class, I built an interpretation of Sagan’s Tesseract using wire and thread. In Sagan’s interpretation, the 3D shadow of a Tesseract looks like a small cube inside a larger cube, where each corner of the small cube is connected with a corner in the large cube.
Welding the Skeleton
First, I decided to build a skeleton made with wire. I cut 12 pieces 15 cm long for the larger cube, and 12 pieces 5 cm for the smaller cube. I used a Soldering Iron Kit (the kind used for Electronics) and Tin. Since I didn’t have any means to secure the wire while working, I decided to use sand as support. This allowed me to have control over the angles, and avoid accidents. The downside, sand was everywhere.
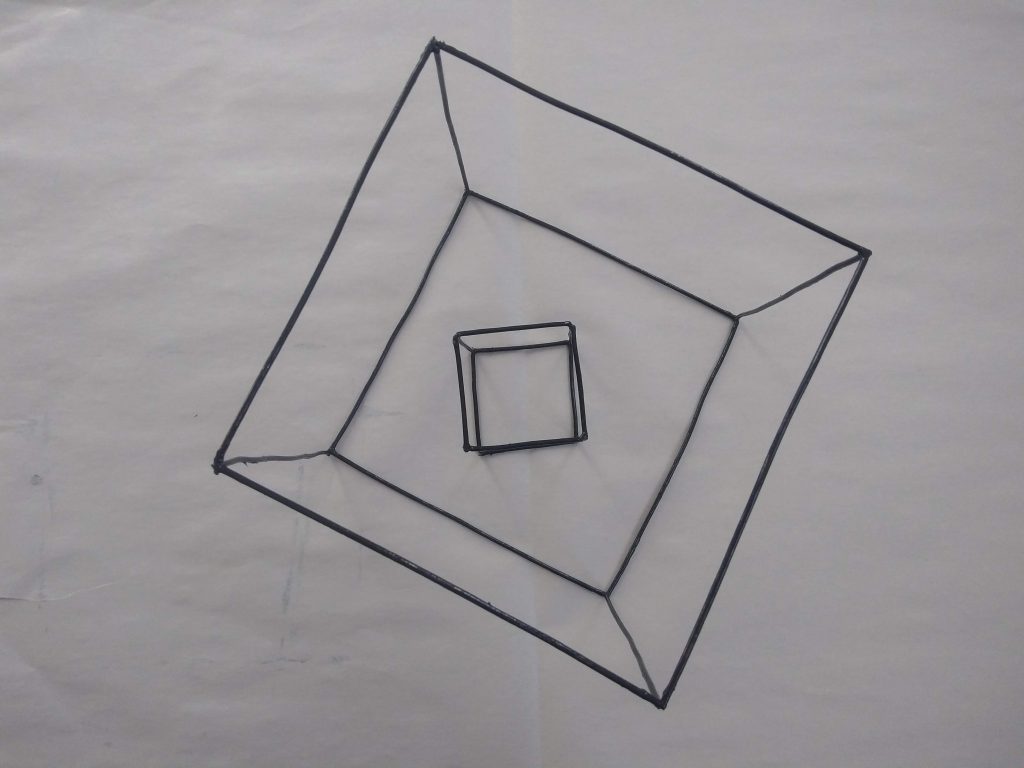
So, I made two cubes, wherein the smaller is a third of the larger. I decided to paint everything black since the wire color is not too pleasing to the eye. Now, to ensure the paint stuck to the wire, I actually used black nail polish, a really smart hack my teacher suggested (works like a charm).
Weaving the Skin
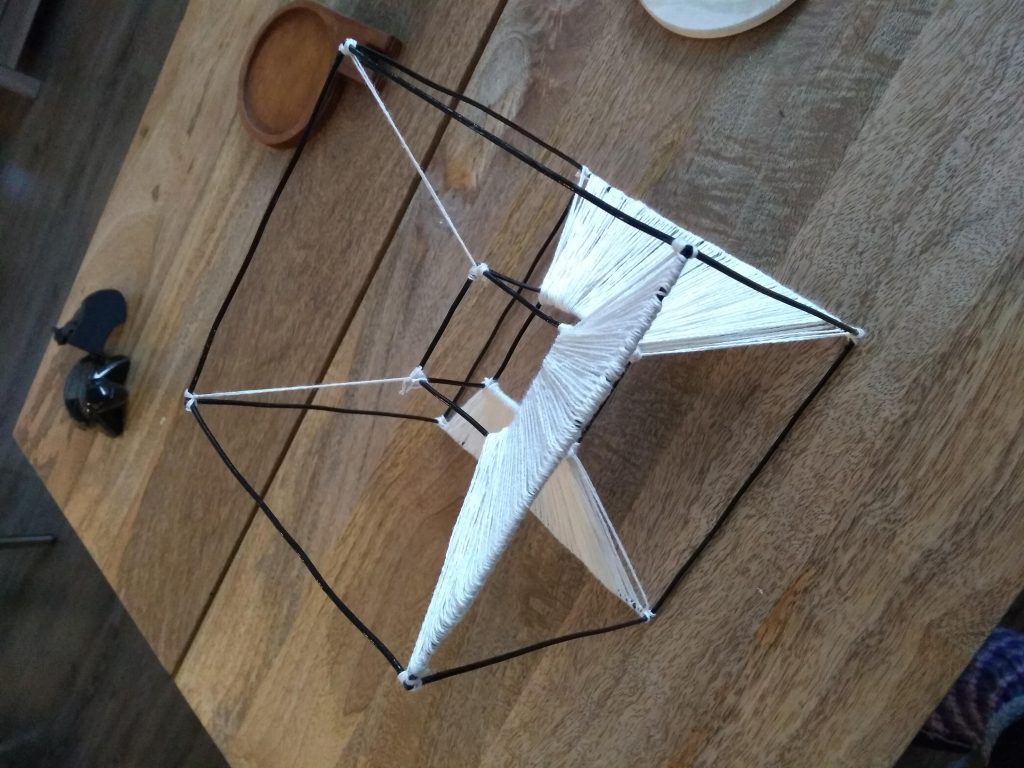
Next step, provide a Skin. I wanted a contrast between the “industrial” feeling of the black wire with some kind of thread. I first tried Jute Rope, but it was to thick for the structure. So I finally used crochet cotton thread in a natural color.
First, I joined the corners of the small cube to the ones in the large cube. Then, I weaved the thread from a side of the small cube to the parallel side in the large cube. To ensure the thread stayed in place, I looped the thread around the edge of the large cube and place it using transparent superglue. I did this process only in four of the 10 possible planes created by the placement of the cubes.
The final piece
I’m really proud of this piece. The combination of textures and values provides interest from each side.